Thanks to Boldmethod for sharing...
How To Time Your Flare For A Perfect Landing. By Colin Cutler
 Boldmethod
Have you ever felt like you can't figure out when you should flare? You're either flaring too early and leaving yourself high above the runway, or flaring too late and landing hard?
Flaring is by far the hardest part of your landing to master, and it takes the most finesse. But, if you set yourself up properly, with your airspeed on target and your glide path steady, it's really pretty simple.
To have a really great flare and landing, you need to have a couple things under control as you approach the runway: airspeed, and flare height.
First Things First: Airspeed
Let's start with airspeed. Your final approach airspeed depends on two things: your landing weight, and your flap configuration. For most aircraft, you'll find the published final approach speed in your Pilot's Operating Handbook or Airplane Flight Manual. It's often in Section Five, next to your landing distance information, or in Section Four, in your landing procedures.
For our SR-22T, Cirrus recommends that we fly final at 80-85 knots with full flaps. And as we cross the runway threshold, we should be at 79 knots. That's the speed required to achieve the published short field landing performance.
Cessna recommends 60-70 knots with full flaps on final, and 61 knots across the threshold for a short field landing distance for the 172. Again, that's the speed required to achieve the POH published landing performance.
Remember that these speeds are published for maximum gross weight. If you're lighter than max gross, you should fly a few knots slower. If you don't, you'll be too fast for your weight, and you'll float your landing.
If you're lighter than max gross and you're still floating down the runway when you flare, continue taking a couple knots off each time you cross the threshold, until you find the speed that works for you. Small changes in airspeed can make a big difference.
If your aircraft's manufacturer doesn't recommend a final approach speed, the FAA recommends that you use 1.3 x VS0.
Altitude: When Exactly Are We Supposed To Start Flaring?
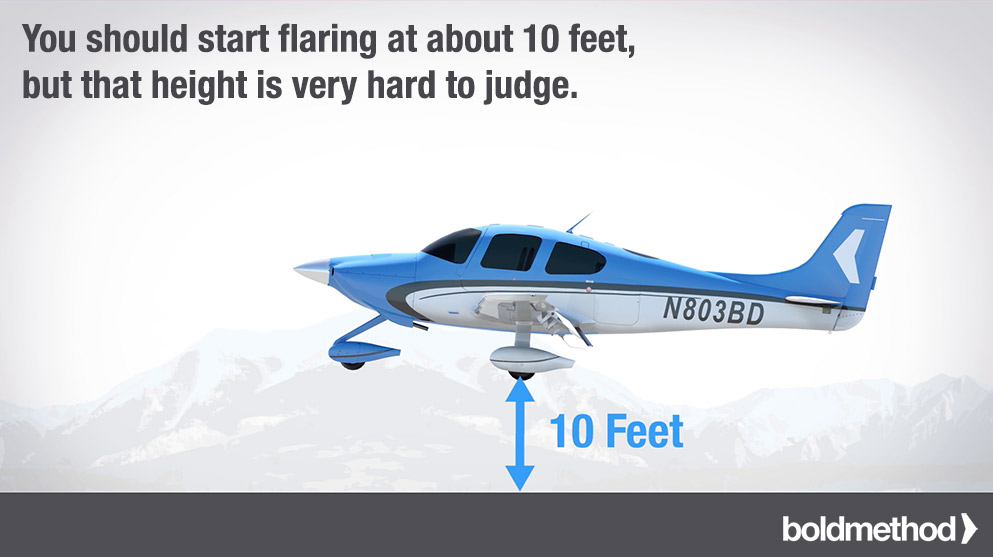
Now that you're on speed for the flare, you need to judge the right altitude to start pulling the aircraft's nose up for the flare and landing.
For almost all general aviation aircraft, you should start the flare at about 10 feet above the runway. Unfortunately, 10 feet isn't very useful to any of us. That's because your altimeter isn't sensitive enough for you to pick out 10 feet above the runway.
Fortunately, there's a better way judge your flare, which leads us into the video below...
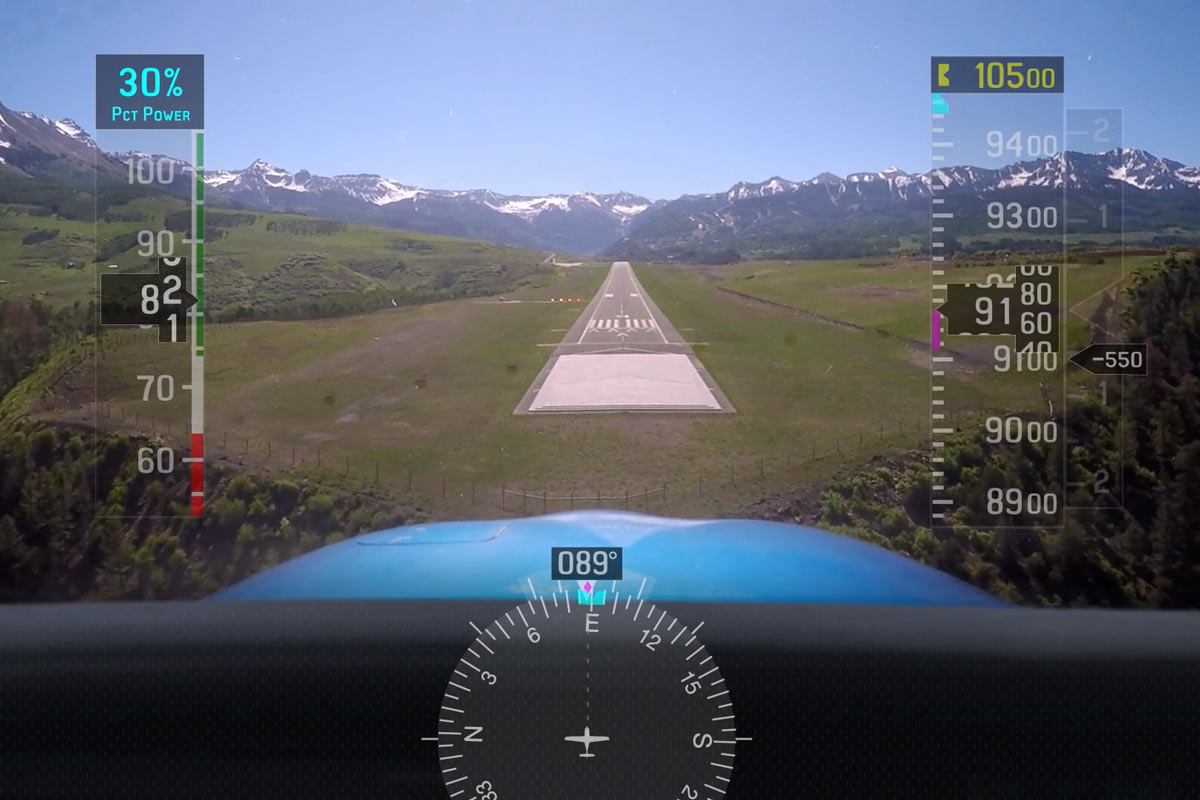
When The Runway Zooms In Size...
Watching for the runway to expand in your windscreen is the perfect way to judge your flare. As you fly down final, the runway grows steadily in your windscreen. But then, as you get about 10 feet above the ground, the runway grows at a rate of nearly 10 times faster than before. When you see the runway "zoom" in your windscreen, it's time to flare.
So what does the zoom look like, exactly? Watch the video below - we've mapped the runway width from short final to touchdown.
The Right Combination For A Perfect Landing
Airspeed and altitude control are the recipe for great landings. If you fly the published speed on final approach, and start your flare when the runway starts zooming in your windscreen, you're setting yourself up for a smooth, soft landing.
When you put it all together, you'll impress your passengers, and yourself.
Want to learn more about making great landings in all kinds of weather conditions? Check out our Mastering Takeoffs and Landings course. It's full of tips and techniques you can use to improve your takeoffs and landings on your next flight.
Become a better pilot.
Subscribe to the Boldmethod email and get real-world flying tips and information direct to your inbox, every week.
No comments:
Post a Comment